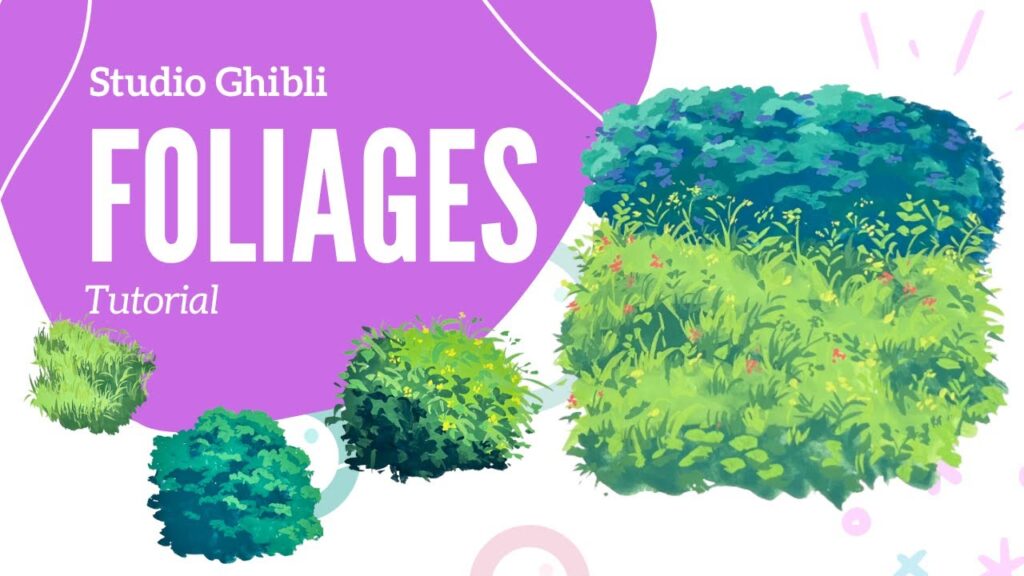
Studio Ghibli is renowned for its enchanting landscapes, lush greenery, and magical ambiance. One of the studio’s most iconic visual elements is its stylized foliages and bushes, brimming with life and emotion. If you’ve ever wondered how to paint Studio Ghibli style foliages & bushes, you’re in the right place. This comprehensive guide will walk you through every step, ensuring your foliage compositions are not only accurate but soul-stirring.
Whether you’re an aspiring concept artist, a digital painting enthusiast, or a traditional art lover, mastering Ghibli-style greenery can significantly boost your portfolio and visual storytelling prowess.
What Makes Ghibli-Style Foliage So Unique?
Before we dive into techniques, it’s vital to understand what sets Studio Ghibli’s greenery apart:
- Whimsy & Emotion: Ghibli foliage isn’t just background filler; it’s integral to the narrative mood.
- Color Harmony: Soft, layered greens with occasional pops of color reflect seasons and emotions.
- Organic Shapes: No harsh lines or perfect geometry — it’s all about natural flow.
- Light & Shadow Play: Subtle variations bring depth and movement.
Understanding these traits helps replicate not just the look, but the essence of Ghibli’s style.
Materials & Tools You Need
Traditional Media:
- Watercolors or Gouache: Ideal for blending and layering
- Brushes: Round brushes for detailing and flat brushes for texture
- High-quality paper: Cold-pressed watercolor paper is recommended
Digital Media:
- Software: Procreate, Photoshop, or Krita
- Brushes: Custom foliage brushes or textured round brushes
- Tablet: Wacom, iPad Pro, or equivalent
Step-by-Step Guide: How To Paint Studio Ghibli Style Foliages & Bushes
Step 1: Gather References
Ghibli films like My Neighbor Totoro, Princess Mononoke, and Spirited Away are goldmines of inspiration. Pause scenes with intricate foliage and study:
- Leaf shapes
- Light behavior
- Color palette
- Brush textures
Step 2: Sketch the Composition
Start with a loose sketch. Focus on big shapes first:
- Create a hierarchy of elements (e.g., big bushes in the foreground, delicate plants in the background)
- Use soft, circular motions
- Avoid symmetry — nature is diverse
Step 3: Block in Base Colors
Begin with flat colors:
- Use muted greens, soft yellows, and earthy browns
- Keep the saturation low; you’ll layer more vibrancy later
Step 4: Layer and Texture
This is where the magic happens:
- Wet-on-wet (traditional): Blend softly
- Layer modes (digital): Use Multiply for shadows and Overlay for light
- Use textured brushes to dab in foliage clusters
Step 5: Lighting and Highlights
Ghibli foliage often glows with a soft internal light:
- Add warm light from one direction (usually top left)
- Use a soft brush to gently layer in highlights
- Introduce color shifts (greens to yellows or blues) to indicate depth and richness
Step 6: Add Details
Details make the difference:
- Tiny leaves and stems
- Occasional flowers or berries
- Textures on leaves (veins, edges)
Step 7: Final Touches
Polish your artwork:
- Add subtle ambient light
- Create a few floating particles for magic
- Zoom out and ensure composition is balanced
Expert Tips to Elevate Your Ghibli-Style Foliage
- Observe Real Nature: Go on nature walks and sketch foliage in person
- Use Color Pickers Sparingly: Train your eye for natural hues
- Practice Layering: Don’t rush. Ghibli art is built up gradually
- Use Negative Space: Leave breathing room between bushes and plants
- Tell a Story: Add a hidden creature or a glowing mushroom to enhance narrative
Key Color Palettes
Here are some essential palettes inspired by Studio Ghibli:
Spring Forest
- Light Green: #A8D5BA
- Warm Yellow: #FCE38A
- Earth Brown: #9C6B4A
Misty Meadow
- Soft Blue: #A3D2CA
- Moss Green: #557A46
- Pale Grey: #D9D9D9
Sunset Bushes
- Golden Orange: #FFB347
- Deep Green: #4A6B47
- Rose Pink: #F7C6C7
Common Mistakes to Avoid
- Over-detailing early: Start broad, detail later
- Too much contrast: Ghibli style favors harmony over drama
- Uniform shapes: Mix leaf sizes and bush structures
- Ignoring atmospheric light: Always consider time of day
Key Takeaways
- Studio Ghibli foliage is about feeling as much as realism
- Use organic shapes, subtle lighting, and layered colors
- Whether traditional or digital, layering is essential
- Tell a story through your plants
Conclusion
Painting Studio Ghibli style foliages and bushes is a soul-enriching experience that connects you with both nature and storytelling. By studying Ghibli’s methods and practicing consistently, you’ll develop not only skill but emotional resonance in your art. Remember, the goal isn’t just to replicate but to evoke a world where nature feels alive and meaningful.
Stay enchanted, and let your brushes carry the magic forward.
FAQs
1. Do I need expensive tools to start painting Ghibli-style foliage? No. You can start with basic supplies and upgrade as you grow. The essence lies in technique, not tools.
2. How long does it take to learn this style? It varies, but with regular practice, noticeable improvements can be seen within a few months.
3. Can I use this style in my own projects? Absolutely! Just ensure it’s an inspiration and not a direct copy of specific Ghibli artworks.
4. Is this style suitable for digital painting only? Not at all. Many artists achieve wonderful results with watercolors, gouache, and colored pencils.
5. Are there any recommended brushes for digital foliage? Yes. Textured round brushes, scatter leaf brushes, and custom foliage packs are excellent choices.
6. How do I keep my foliage from looking flat? Focus on light, shadow, and color variety. Always think in layers and planes.


